Census (PowerPoint)
Make a presentation about census stats
Introduction
This is a guide to creating a recipe for a presentation containing demographics statistics of a fictional place called Anytown. The aim of the guide is to illustrate the process of setting up a PowerPoint recipe in Documotor.
What will I learn?
After following this guide, you'll be able to:
- Create a new PowerPoint recipe.
- Add dynamic elements to a PowerPoint template.
- Add data to a PowerPoint recipe.
- Insert text fields into a PowerPoint template.
Prerequisites
You'll need access to a Documotor tenant, and it's assumed you've built your first recipe. The approach in PowerPoint is very similar to the setup of Word recipes, so we'll focus on the differences here.
Navigate the UI
Just like for the Word recipe, start by navigating to a folder of your own choosing (perhaps the one you created for the previous exercise), select New Recipe > Recipe, and then the PowerPoint (.pptx) type to indicate it's a PowerPoint recipe, name it "Census" and open it.
Sample data and template
Here is the data that we'll use to populate the sample template:
{
  "placeName": "Anytown",
  "population": 42000,
  "density": 430,
  "averageAge": 39,
  "workingAgePopulation": 30000,
  "underagePopulation": 5000,
  "retirementAgePopulation": 7000
}
Copy it, navigate to the Data view, and inside Sample Data, select the pen button to enter edit mode, then paste the data and update it by using the arrow button next to the pen.
Download the sample template, and then navigate to the Template view and upload it using the upload button in the right side of the Binding Editor toolbar.
At any point, you can save your work by pressing Ctrl+S or the Save button in the top-left.
Bindings
Just like in Word, the workflow will consist of creating a binding in the template and choosing a binding key, the key of the input data whose value you want to insert, and repeating the process for all the elements in the template that are supposed to be dynamic.

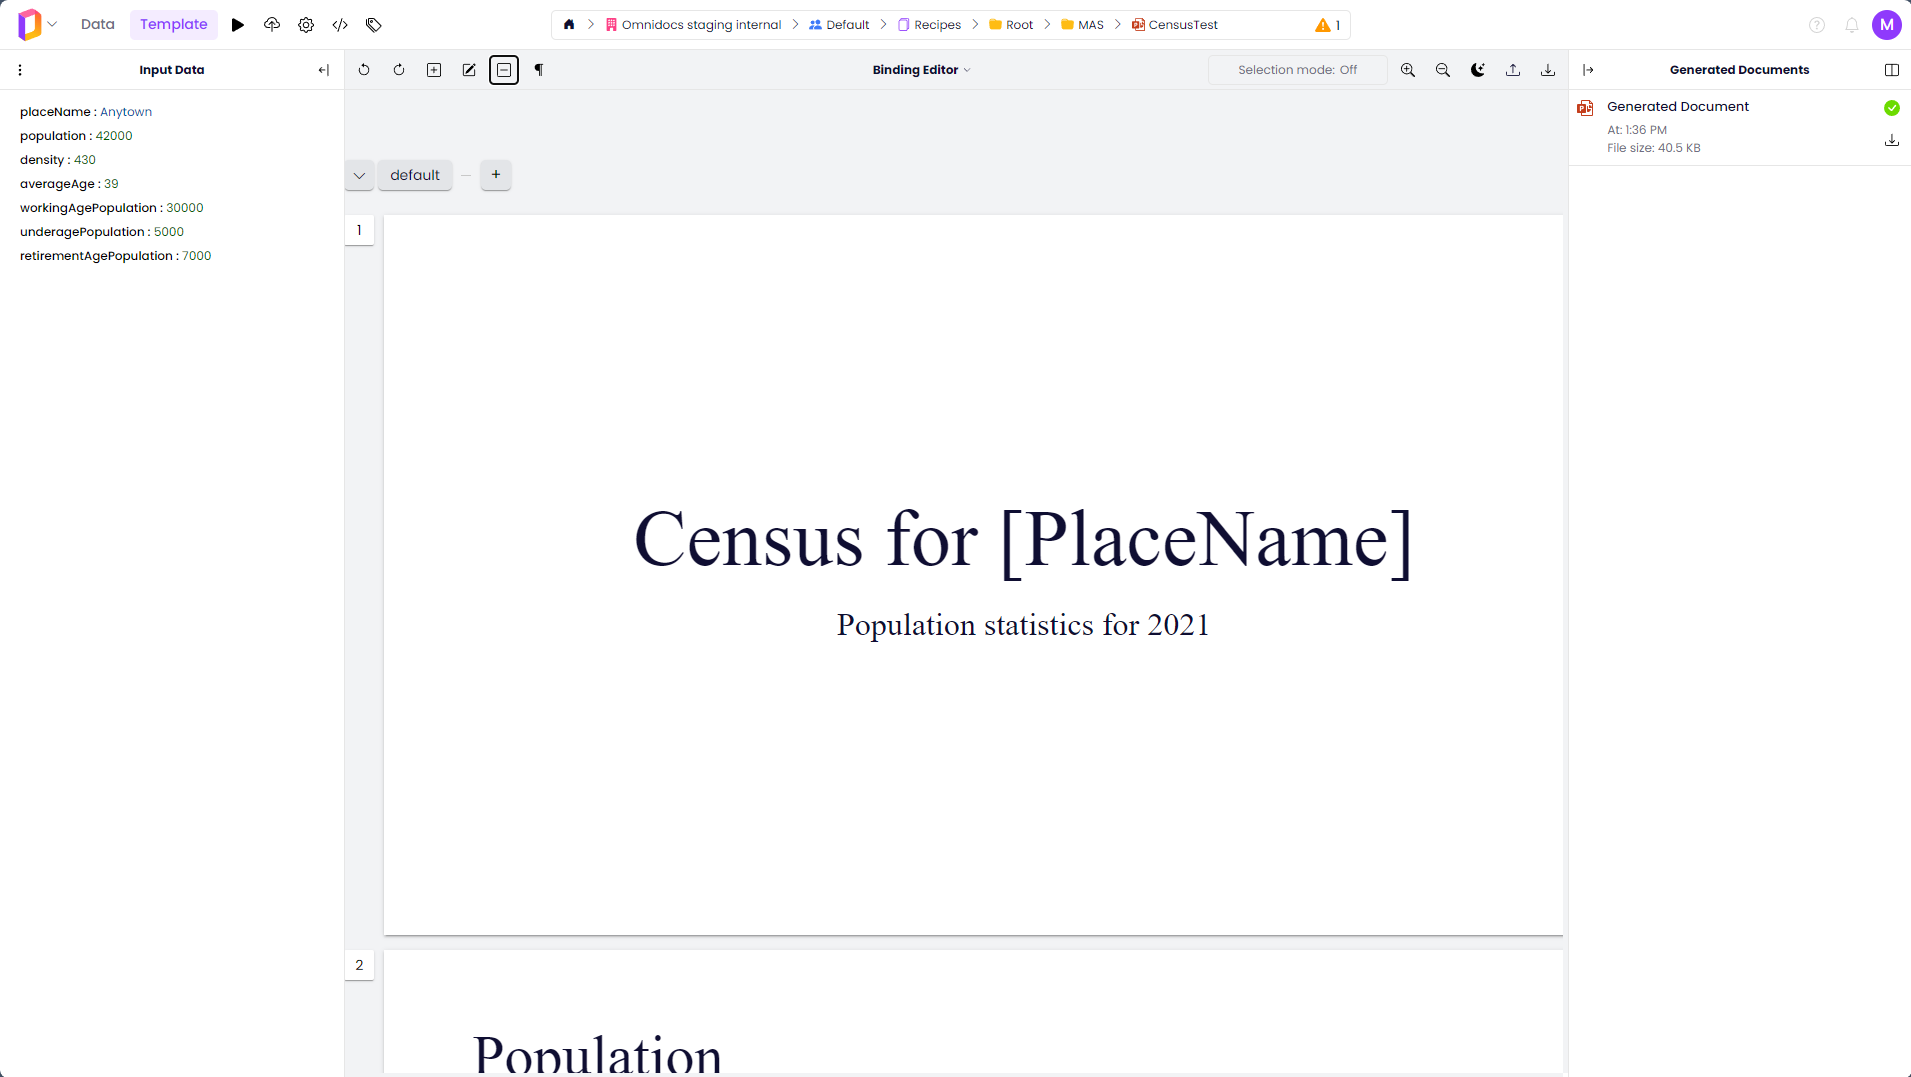
The binding editor for PowerPoint templates.
The only binding type needed for this template will still be Field. Inside the UI, the process of inserting Field bindings is very similar to the one in Word:
- Select a piece of text.
- Select the Add binding button in the top-left of the editor, also accessible by the Alt+A shortcut.
- Choose the Field binding type.
- Select one of the possible binding keys from your data.
- Edit the default display name of the field if needed.
- Press OK.
Follow these steps to insert field bindings around all the placeholders in the template, indicated by the square brackets. For each one, the binding key should be the text inside the bracket. Generate the document, inspect for and correct any mistakes. Remember to save the recipe when you're satisfied with the output.
Updated 9 months ago