Recipe Editor
Navigate recipes
From the home page, navigate to Recipes and open a recipe to enter the Recipe Editor. If you don't have any recipes yet, create one:
- From the Navigation Pane (accessible from anywhere by selecting the Documotor logo in the top-left), select Recipes.
- Navigate to your desired folder and select New Recipe > Recipe.
- Enter the name for your new recipe.
- Select Create.
- Open the recipe.
While you're in the Recipe Editor, you can find the recipe ID in the URL after the last slash /.
The Top Bar
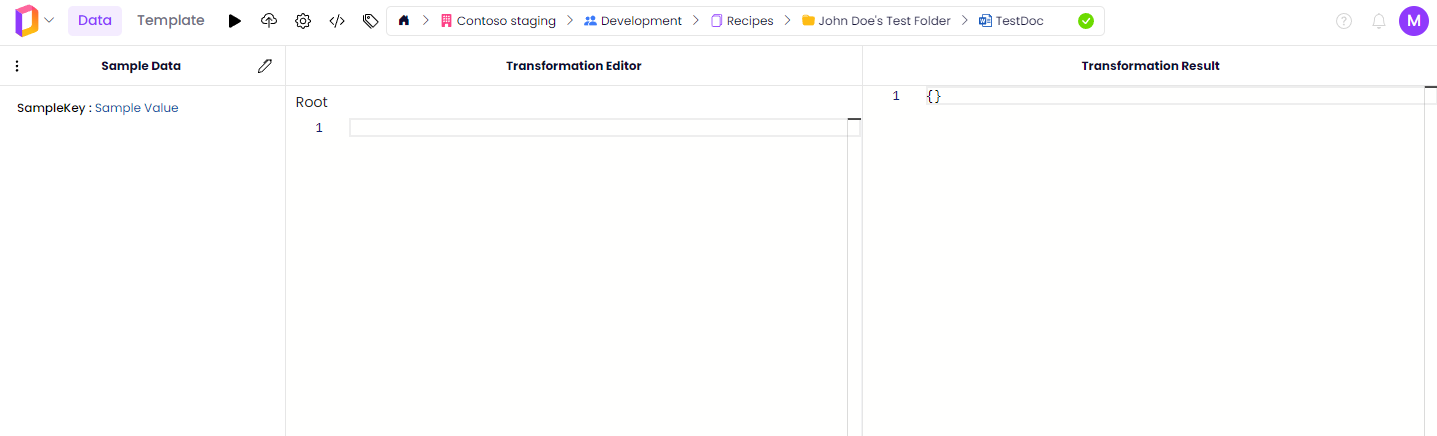
At the very top, you can find the Top Bar. From the left to the right, you can first find a Documotor logo dropdown that opens a navigation pane, just like the one outside of the Recipe editor. Next, you can switch between the Data and the Template tab. Both of these are split into three tabs, and you can see the Top Bar from the data view below:
Page Actions Menu
The Page Actions Menu can be found following the Data and Template tabs. It consists of Run, Save, Settings, Snippets, and Tags icons.
Run
In the data view, applies the transformation from the Transformation Editor to the Sample Data and yields a result in the Transformation Result pane. In the template view, it inserts the Input Data into the template defined in Template Editor, and generates a document that can be previewed by selecting a document from the Generated Documents pane.
Save
Saves your changes, at the same time for all of the components of a recipe.
Settings
See latest changes to the document, and set options: Record Sample Data, Trim End (remove any empty space from the ends of generated documents), and Output as PDF.
Snippets
Get Curl and Postman snippets to the recipe.
Tags
Add tags to recipes for easier searching.
Further to the right is the Location Bar, and in the top-right, you can find the Help and Resources, Notifications and User Settings buttons. We'll inspect the data and template views next.
The Data Tab
The data view is used for inserting sample data and transforming it into a structure that fits the template. On the left, you can find the Sample Data pane, in the middle the Transformation Editor, and to the right, the Transformation Result. Each of these can be resized or hidden completely by dragging the bars in between them to either side.
Sample data
This pane is used for adding sample data to test the recipe on.
The input data is inserted into Sample Data by pressing the Edit icon and pasting the data and selecting Update, or uploading a file by navigating to Dot Menu > Upload. The input data has to be of JSON format. The Dot Menu also contains the options to Expand or Collapse the entire data structure (useful with larger datasets), Copy path to clipboard, and Download the sample data.
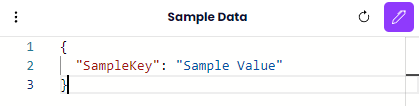
Edit mode of the Sample Data tab, with the update button.
Transformation Editor
Simple pane for writing JMESPath code. Includes syntax highlighting, numbered lines and suggestions. You can toggle suggestions when writing a function name by using the Ctrl+Space shortcut, and get the API reference for the highlighted function by pressing the same keys again.
Any warnings in code are underlined yellow, and the piece of code that causes an error is underlined red.
CodeLens
CodeLens is a feature in the Transformation Editor that enables the user to focus on one branch in the transformation. The feature, if disabled, is toggled by clicking the Root button in the top right of the editor.
Focusing on a smaller scope is done by clicking the small link above the transformation line, as seen in the image here:

Selecting the currentDate link the user further into the scope of the transformation, only leaving that transformation in view:

To get back to the upper levels of the transformation, the user can select any of the levels at the top of the Transformation Editor, only Root in the given example.
Transformation Result
The result of applying the transformation in the Transformation Editor to the Sample Data. For it to appear, one must run the transformation using the Run button from the Top Bar.
The Template Tab
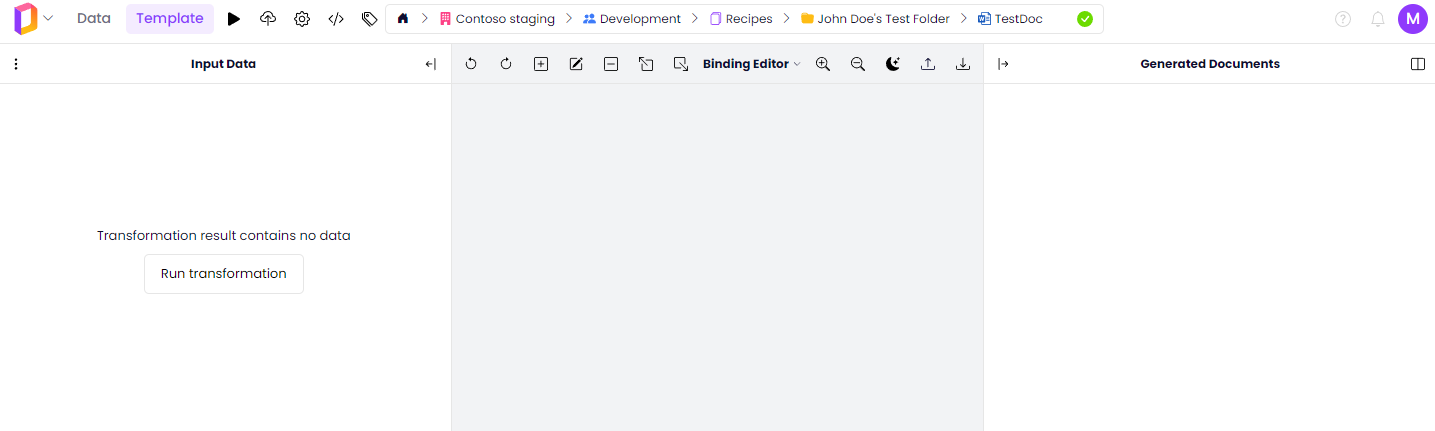
The Template view is used for defining the way the data gets inserted into the template. The left-hand side pane is called Input Data, the middle one Binding Editor, and the right-hand side pane is called Generated Documents.
Input Data
The data present in the Input Data view is the same data as the one from the Transformation Result pane in the Data tab. This is the data that is ultimately inserted into the template, so it's useful to have it visible while working on the template.
The Dot Menu is very similar to the one in the Sample Data tab due to similar needs, except that there is no upload option there; data is uploaded exclusively to the Sample Data pane. Similarly, there is no edit option here, since this is the final data to be used. There is also a Collapse option to hide the pane entirely, except for an Expand arrow to view it again.
Binding Editor
The Binding Editor tab contains all functionality related to uploading and downloading the template, as well as adding, removing, and editing the bindings in the template. You can also select Binding Editor to change to a Microsoft 365 preview of the template, instead of the basic, binding-focused rendering of the template.
The left side of the Binding Editor Toolbar consists of binding actions, the right side consists of view and template settings.
The first two buttons are standard Undo and Redo buttons. They are followed by Add Binding, Edit Binding, Delete Binding, Move Up, Move Down and Toggle Paragraph Symbols. Here's how to use them.
How to insert a binding
- Highlight a piece of text where you want the binding to be. It's easiest to insert bindings into text placeholders, so try to ensure all of your bindings have a designated place in the template indicated by a piece of text. Our recommended style is to use PascalCase names enclosed in square brackets.
- Select Add Binding.
- From the dropdown that opened, select the binding type that you need.
- In the dialog box, fill in the parameters of the binding. Most importantly, select a data value in the Binding Key textbox.
- Select the Data button on the right side of the textbox and highlight the needed piece of data from the box that opened.
- Alternatively, write a path to the desired piece of data manually into the Binding Key textbox.
- Repeat this for any other parameters.
- Fill in the Display Name of the binding if needed.
- Select OK.
Special characters, like newline '\n', cannot be inserted as binding parameters inside the editor. They must instead be inserted manually into the content control inside word, or in the slide/section/alt text in PowerPoint.
How to edit a binding
- Highlight a binding from the template.
- Select Edit Binding.
- Follow steps 4-7 from How to insert a binding to set the parameters up as intended.
Editing a blank binding to insert a chart in the Template editor.
How to delete a binding
- Highlight a binding from the template.
- Select Delete Binding.
Move Up and Move Down
These buttons set the scope of certain bindings. For example, bindings that can are set up on a row of a table can be moved up to enclose the entire table instead of just the row. Similarly, they can be moved down in scope as well.
View and template settings
The Zoom Buttons are used to adjust the zoom level as needed. The Switch Contrast button changes the background to black and text to white. Useful since the background color is not fetched in the Binding Editor to improve performance, so white text templates might need the dark background. Finally, Upload and Download buttons enable adding a new template or downloading the present one to make edits in Microsoft 365 while ensuring you're working on the current version of the template.
The example screenshots are from a Word recipe, and until now, there were no differences between Word and PowerPoint. However, PowerPoint has an additional Selection mode toggle. Selection mode is off by default, but toggling it on enables selecting multiple slides in order to bindings that pertain to sections. Inserting other bindings is not possible in Selection mode.

The Selection mode toggle in the PowerPoint editor.
Generated Documents
The Generated Documents pane contains all the documents generated in the current session. Selecting one of the documents previews it in place of the Binding Editor, but there is an option to open a document in Split View, side by side with the template. The only other option is to Collapse the pane. You can also download any generated document by selecting the Download icon either in the pane or the document preview.
Updated about 1 year ago